Wondering how to create the perfect photo border in Photoshop? This guide covers everything from basic borders to creative effects. Want to make your photos stand out? Let’s explore the top methods for a stunning Photoshop photo border!
Photoshop is an incredible tool for photo editing, allowing photographers and designers to customize their images in countless ways. One of the most effective ways to enhance your photos is by adding a photo border. Whether you’re looking for a classic look or something more artistic, Photoshop offers multiple ways to apply borders. In this article, we’ll explore how to create different types of borders, including simple, gradient, and creative effects.
1. Making a Photoshop Photo Border
When you start creating a photo border in Photoshop, the process is simple but requires a good understanding of the tools and layers involved. The goal is to frame your image effectively, either to draw attention to it or to enhance its aesthetic appeal.
Steps for Making a Simple Photo Border:
-
Open your photo in Photoshop Begin by opening the image you want to edit.
-
Create a new layer Click on the “Layer” menu, then “New”, and select “Layer”.
-
Select the Rectangular Marquee Tool This tool will allow you to create a selection around your image. Use the tool to draw a rectangle around the area where you want your border.
-
Feather the selection To make the edges of your border softer and smoother, go to “Select” > “Modify” > “Feather” and adjust the feather radius to your liking.
-
Fill the selection with color Choose the color you want for your border. You can use the paint bucket tool or edit the layer style to give the border a unique look.
Tips:
-
Layer Styles You can apply a “Stroke” to the border by using layer styles. This adds a solid color around the edge of the photo and allows for easy adjustments.
-
Padding Adjust the padding between the photo and the border to control how much space the border occupies.
By following these basic steps, you can create a sleek and simple border to enhance the edges of your photo. But this is just the beginning—let’s explore more advanced border techniques!
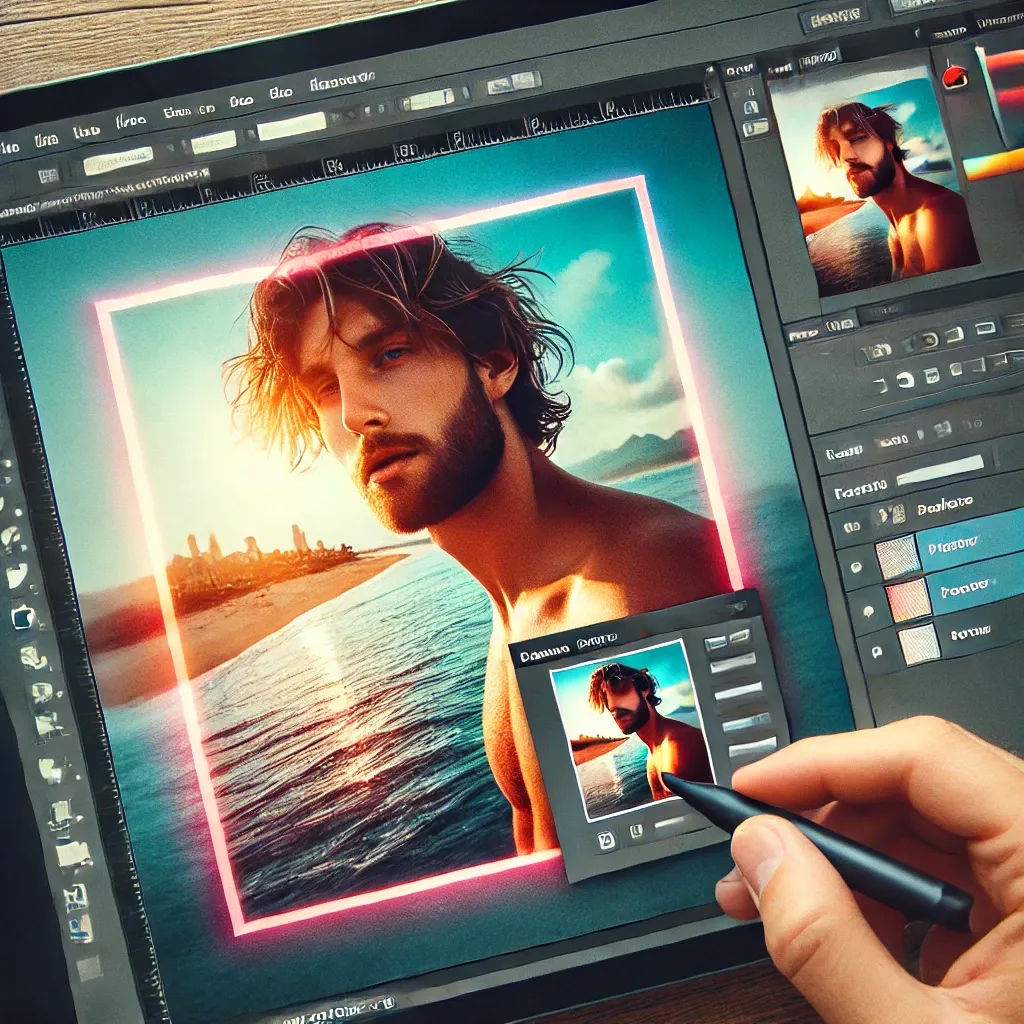
2. Photoshop Photo Border Effect: Adding a Creative Touch
Sometimes a simple border isn’t enough, and you might want to experiment with more creative effects. Adding textures, gradients, or blurred borders can make your image stand out even more.
Applying a Gradient Border Effect:
-
Select the Gradient Tool In the tools panel, select the Gradient Tool. Choose a gradient style that fits the tone of your photo—this could be a simple black-to-white gradient or something more complex.
-
Draw the Gradient After selecting the gradient, click and drag from one edge of your photo to the other. You can adjust the direction and length of the gradient to control how it blends with your image.
-
Adjust Layer Opacity To make the effect more subtle, reduce the opacity of the layer.
Using Blurred Borders:
-
Create a Duplicate Layer Make a duplicate of your original photo layer.
-
Apply Gaussian Blur Select the duplicate layer and go to “Filter” > “Blur” > “Gaussian Blur.” Adjust the blur radius to create a soft, blended edge.
-
Add a Mask Use a layer mask to selectively apply the blur to only the border areas, leaving the center sharp and clear.
Creative Border Ideas:
-
Texture Borders Use textured brushes or patterns to add a unique flair to the border.
-
Soft Borders For a more subtle effect, you can blur the border slightly, allowing the image to blend seamlessly into the background.
These creative effects can really elevate your design and give it a polished, professional appearance.
Check out More Creative Border Ideas!
3. Photoshop Photo Border Layer: Mastering Layer Adjustments
Layering is a crucial concept in Photoshop. When applying a border to your image, you often need to work with multiple layers to achieve the desired effect. Understanding how to manipulate layers effectively will give you full control over your photo border.
How to Work with Layers:
-
Create a New Layer for the Border This ensures that your border is separate from your image and can be easily edited or removed.
-
Adjust Layer Position You can move the border layer above or below the photo layer depending on the effect you want.
-
Blend Modes Experiment with different blend modes to alter how the border interacts with your photo. For instance, the “Overlay” blend mode can create a more natural look for the border.
-
Layer Styles Photoshop’s layer styles, such as “Drop Shadow” or “Inner Shadow,” can add depth to your border.
Layer Techniques to Try:
-
Multiple Borders You can stack multiple layers with different border effects to create a more intricate design.
-
Refining Edges Use the “Refine Edge” option to smooth or feather the edges of the border for a more professional look.
The layer system in Photoshop provides endless possibilities for customizing your photo borders, from simple solid lines to complex textured or gradient effects.
Learn More About Layer Adjustments!
Conclusion
Whether you’re looking to create a simple, elegant border or a more creative, layered effect, Photoshop gives you the tools to customize every aspect of your photo border. By using techniques like gradient fills, soft blurring, and layering, you can easily enhance the visual appeal of your photos. So, the next time you’re working on an image, try experimenting with different border styles and effects to bring your photos to life!
As they say, “A picture is worth a thousand words,” and with the right border, that picture becomes even more impactful.