Curious about creating an old, vintage look in Photoshop? Learn how to make your photos look like they are from a different era with tips and techniques for adding an antique touch.
Old photos carry a nostalgic charm, often evoking the feelings of a bygone era. In today’s digital world, transforming a modern photo to look like an old one has become easier than ever with Photoshop. This article delves into how you can use Photoshop tools to create vintage effects, modify old photos, and even apply specific patterns for that authentic aged feel. Whether you’re aiming to restore a historic image or create a faux antique masterpiece, these techniques will guide you through the process.
Photoshop Old Feeling: Creating a Timeless Vintage Look
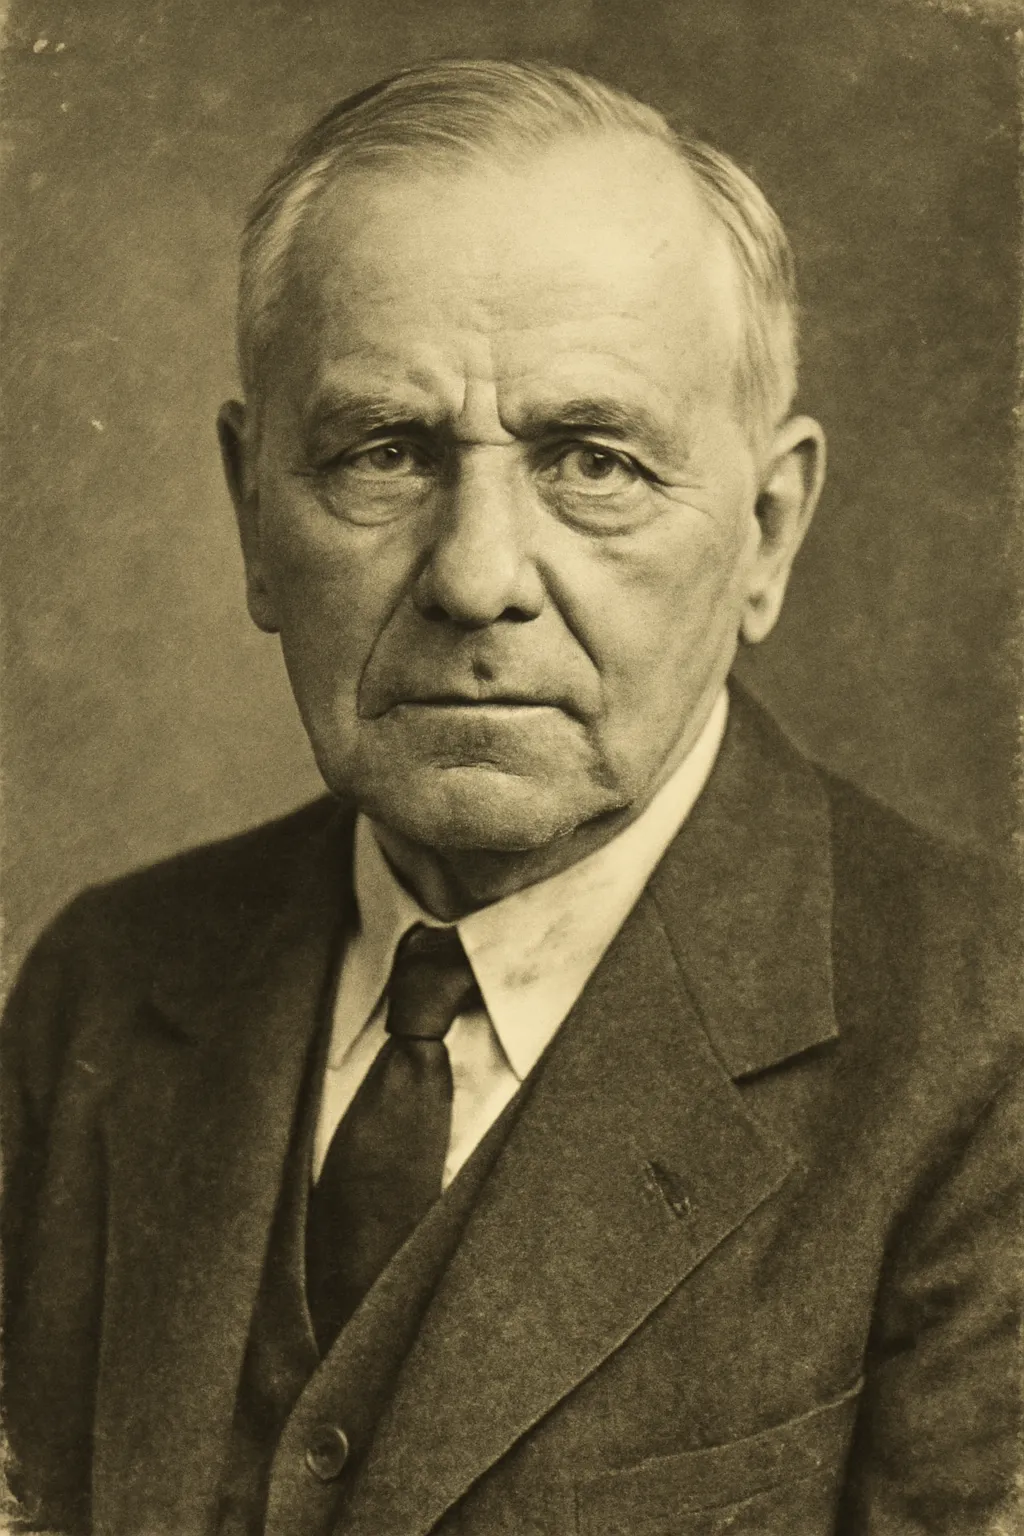
The first step to crafting an old photo effect is understanding the essence of aged photos. Old photographs often exhibit faded colors, a grainy texture, and signs of wear like creases and scratches. The sepia tone, a warm brownish tint, is synonymous with vintage photos, adding a sense of history and depth to the image.
Techniques to Create the Old Feeling:
-
Convert to Black and White One of the simplest methods to create an old-fashioned feel is converting your image to black and white. Photoshop allows you to fine-tune the grayscale values, giving the image a classic look. Go to Image > Adjustments > Black & White to begin the transformation.
-
Apply a Sepia Tone Sepia tones are a hallmark of old photos. You can easily apply a sepia effect using a gradient map in Photoshop. Go to Layer > New Adjustment Layer > Gradient Map, and choose the sepia tone gradient. Adjust the opacity and blending mode to suit your needs.
-
Add Noise and Grain Older cameras often produced grainy photographs due to film limitations. To replicate this effect, add some noise to your photo by going to Filter > Noise > Add Noise. This gives the image a subtle texture, making it look more aged.
For more advanced results, consider combining these techniques with additional layers for enhanced aging, such as adding a vignette or slight blurring around the edges.
🔍 Explore more techniques for old photo effects 🔍
Photoshop Old Photo Modification: Enhancing the Vintage Look
Transforming modern photos into old ones is a matter of understanding the interplay between age and style. Old photos don’t just look faded; they often carry a sense of texture and tangible wear and tear. Modifying these aspects in Photoshop involves creating these characteristics artificially.
Modifying Photos to Look Old:
-
Distress Your Photo with Texture Layers The texture of old photographs is one of their defining characteristics. To replicate this, you can overlay textures like paper creases, dust, and scratches. Find high-quality vintage textures online or use Photoshop’s built-in texture filters to add these effects.
-
Use the Clone Stamp Tool for Restoration If you’re working on restoring an old photo, the Clone Stamp tool becomes invaluable. It allows you to remove imperfections and bring back lost details, but it can also be used to replicate damage in a controlled manner, making your photo look genuinely old.
-
Increase Contrast and Lower Saturation Old photos often show a reduction in contrast and color saturation. You can adjust these elements by navigating to Image > Adjustments > Brightness/Contrast, and reducing the saturation with Image > Adjustments > Hue/Saturation.
Another fun technique for those with more experience is creating faux tears or bends in the image. By carefully using the warp tool and blending the damaged areas, you can give your photos a truly aged, worn appearance.
🔍 Learn more about modifying old photos 🔍
Photoshop Thick Diagonal Pattern: Adding a Distinctive Element to Your Vintage Photos
An intriguing method to make your photos look more like vintage prints is by incorporating specific patterns, such as thick diagonal lines, often found in older printed photographs or when a specific filter is applied. This pattern effect was commonly seen in printed photographs during certain periods, giving them a unique aesthetic.
How to Create the Diagonal Pattern:
-
Create the Diagonal Pattern Using the Pattern Tool Start by creating a diagonal pattern in Photoshop. Go to Edit > Define Pattern, and choose a simple diagonal line or design. This pattern can be overlaid on your photo as a subtle texture.
-
Adjust the Pattern’s Opacity Once the pattern is applied, reduce its opacity to blend it seamlessly with the rest of the image. You can also play with the blending modes to achieve different looks, such as overlay or soft light.
-
Add a Layer Mask To ensure the pattern doesn’t overwhelm the photo, add a layer mask and gently brush away parts of the pattern that are too harsh, keeping the effect balanced and authentic.
Using diagonal patterns can give your photo that extra vintage flair and enhance the overall aesthetic, adding an artistic touch that mimics older print techniques.
🔍 Learn how to add thick diagonal patterns in Photoshop 🔍
Conclusion
Transforming a modern photograph into one that looks old requires an understanding of various Photoshop tools and techniques. From applying sepia tones and noise for texture to creating specific patterns, there are numerous ways to give a photo that antique feel. These steps can be used for both creative projects and the restoration of old images, providing endless possibilities for enhancing your photos with vintage effects. The ability to modify old photos with such precision is a powerful skill for photographers, designers, and enthusiasts alike.
Remember, Photoshop offers a variety of options to simulate the passage of time, and each method adds a unique touch that reflects a specific period in photography history. So, dive in, experiment, and create stunning vintage photo effects that will impress anyone who views your work.