Are you unsure how to check your car’s engine oil? Is it better to check the engine oil when it’s cold or hot? Get the answers to these questions, and learn the step-by-step process of measuring your engine oil properly to ensure your vehicle stays in top condition.
How to Check the Engine Oil
One of the simplest yet most vital maintenance tasks you can perform on your vehicle is checking the engine oil. A well-maintained engine ensures smooth performance, better fuel efficiency, and prolongs the life of your car. Checking your engine oil regularly should be part of your car care routine, as this can help prevent engine damage and costly repairs.
Step-by-Step Process to Check Your Engine Oil:
-
Park the car on a level surface: Before starting the check, make sure your car is parked on a level surface. This ensures that the oil settles evenly in the oil pan.
-
Turn off the engine: Allow the engine to cool for at least 5-10 minutes if it has been running. Hot oil can be difficult to read, and you may risk burns when handling the dipstick.
-
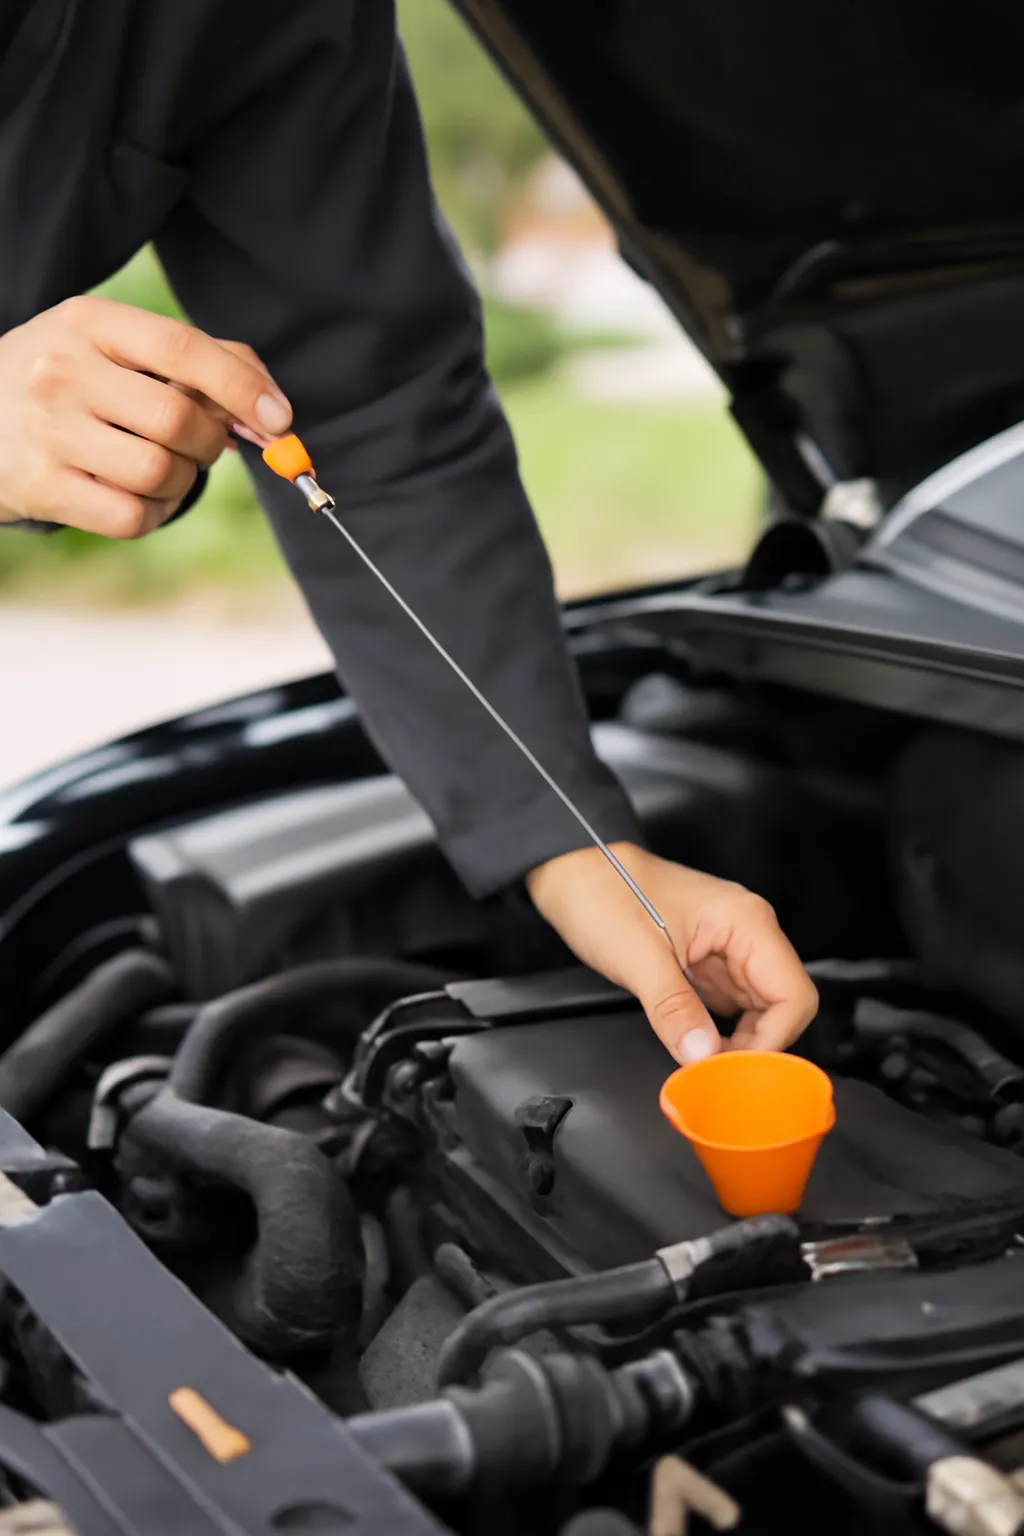
Locate the dipstick: Open the hood of your car, and find the dipstick. It is often located near the engine, with a brightly colored handle for easy identification.
-
Remove the dipstick: Pull out the dipstick and wipe it clean using a rag or paper towel. This step removes any oil that may have splashed up the dipstick tube, giving you a clearer reading.
-
Reinsert the dipstick: Push the dipstick all the way back into the tube and then pull it out again.
-
Check the oil level: Look at the oil level on the dipstick. The dipstick will have markings showing the correct oil range, usually marked as “full” or “low.” The oil should be within this range.
Why Checking Oil is Essential:
Regular checks help ensure that the engine oil is neither too low nor contaminated with debris, which can lead to engine wear. Low oil levels can cause severe engine damage over time, leading to overheating, reduced efficiency, and costly repairs.
How to Check the Engine Oil Cold
Checking the engine oil when it’s cold can sometimes give you a slightly different reading than when the engine is warm. However, many car manufacturers recommend checking oil when the engine is cool or just after the engine has been off for a few minutes.
Why Check Oil Cold?
-
Oil settles at the bottom: When the engine is turned off and cool, the oil settles back into the oil pan, providing an accurate reading. When the engine is hot, the oil remains distributed throughout the engine, which can give a false high reading.
-
Safety: Checking oil cold avoids the risk of burns from hot engine components.
-
Recommended in colder climates: If you’re in a region with cold weather, it’s often advised to check oil when the engine is cold as the oil will thicken, and you will get a more stable reading.
How to Check Cold Oil:
-
Wait for the engine to cool: As mentioned, allow your car to sit for at least 5-10 minutes before checking. If you’re checking after the car has been idle for a while, make sure the engine is completely cold.
-
Follow the same steps as a hot check: Pull the dipstick, wipe it clean, and reinsert it fully before checking the oil level.
-
Interpret the reading: In cold conditions, the oil should still be at an adequate level for safe engine operation. If the oil appears thick or sludgy, it may be a sign to get your oil changed or checked for contamination.
Cold vs. Hot Oil Checks:
While both cold and hot checks can be accurate, cold checks often provide a more consistent reading, especially for those new to checking their engine oil.
Engine Oil Measurement Method
There are several different methods to measure engine oil, and the dipstick is the most commonly used tool for this purpose. However, knowing the appropriate technique for accurate readings and understanding the types of measurements can help you better maintain your engine’s health.
Common Oil Measurement Methods:
-
Dipstick Method:
This is the most standard and easiest method for measuring engine oil. By pulling the dipstick out, cleaning it, reinserting it, and removing it again, you can quickly check the oil level and condition. Some dipsticks have markings that clearly show whether the oil level is high, low, or at a safe level. -
Oil Pressure Gauge (For Advanced Vehicles):
Some vehicles, especially newer models, have an integrated oil pressure gauge on the dashboard. This allows you to monitor the oil pressure continuously, which can indicate if the oil level is too low. -
Digital Oil Monitors:
Modern vehicles might come equipped with digital sensors that track oil levels. These readings are often shown on the vehicle’s display system, providing real-time updates on the engine’s oil health. -
Oil Color Check:
While this is not an official measurement method, examining the color of the oil on the dipstick can give you an idea of its condition. Fresh oil is typically amber, while old or dirty oil may appear dark and may require a change.
What to Do When You Notice Abnormalities:
-
Low oil level: If the oil is below the minimum level on the dipstick, add oil immediately. Always use the manufacturer-recommended type and grade of oil.
-
Oil contamination: If the oil appears milky or contains metal particles, it may be time for an oil change or an engine checkup.
-
Dirty oil: Dark, sludgy oil indicates that it’s time for an oil change.
Conclusion
Checking your engine oil regularly is one of the simplest yet most important tasks in car maintenance. Whether you’re checking it cold or warm, ensuring that the oil level is adequate can prevent engine damage and costly repairs. Remember to always use the correct method for checking your oil, and don’t hesitate to top it up or replace it when necessary. Proper oil maintenance is a crucial part of keeping your vehicle running smoothly for years to come.